Welcome to our step-by-step guide on how to build a deck in New Zealand, where outdoor living is a way of life! Whether you’re dreaming of a space to host summer BBQs, relax with family, or simply enhance your backyard, building a deck can transform your outdoor area into a functional and inviting retreat. This guide is designed to help you navigate the entire process, from planning and selecting the right materials to construction and finishing touches, all while keeping NZ’s unique climate and building regulations in mind. So, whether you’re a seasoned DIY enthusiast or a first-time builder, this guide will equip you with the knowledge and confidence to create a deck that’s safe, sturdy, and perfect for Kiwi living.
To build a deck in NZ, start by planning your design, checking local building regulations, and selecting durable materials like treated pine or composite decking. Prepare the site by leveling the ground, install sturdy foundations, and construct the frame with proper spacing. Lay decking boards evenly, secure with corrosion-resistant fasteners, and finish with staining or sealing for long-term durability. Always adhere to New Zealand building codes for safety and compliance.
Table of Contents
Planning Your Deck: A Comprehensive Guide
Proper planning is the foundation of a successful deck-building project. Taking the time to evaluate your needs, understand regulations, set a realistic budget, and select the ideal location ensures your deck not only enhances your outdoor space but also complies with New Zealand’s building requirements. Below, we dive deeper into each essential step of the planning process to help you start your deck project with confidence.
Define Your Purpose
The first question to ask yourself is, “Why do I want a deck?” Your answer will determine the size, style, and features of your deck. Here are some common purposes and considerations for each:
- Entertaining Guests: If you plan to host BBQs, parties, or family gatherings, you’ll need a deck spacious enough to accommodate seating, tables, and perhaps even a grill or outdoor kitchen. A multi-level deck can provide zones for dining, lounging, and socializing.
- Relaxing Outdoors: For those seeking a personal retreat, prioritize comfort. A smaller deck with cozy seating, planters, and perhaps a pergola for shade may be ideal.
- Adding Value to Your Property: A well-designed deck can significantly boost your home’s curb appeal and market value. Consider timeless materials and styles that complement your property’s architecture.
Tip: To determine the right size, think about how many people will typically use the deck and the furniture or accessories you’ll add. A good starting point is 12–14 square meters for an average deck, but adjust based on your specific needs.
Know the NZ Building Regulations
New Zealand has specific regulations for building decks, and it’s crucial to ensure your project complies to avoid fines or structural issues. The primary rule to know is that any deck higher than 1.5 meters above the ground requires building consent. However, even if your deck is under this height, additional factors may require consent, such as proximity to boundaries or inclusion of specific features like balustrades.
Key points to remember:
- If your deck is over 1.5 meters, you must obtain consent from your local council.
- Decks near boundary lines may have restrictions to maintain privacy and prevent encroachment on neighbors.
- Adding railings or a roof structure may also require council approval.
To get accurate and up-to-date information, visit the Building Performance NZ website or contact your local council. Starting your project without understanding these rules can lead to costly delays or fines, so it’s always better to confirm requirements before you begin.
Budgeting for Your Deck
Budgeting is an essential step in planning your deck, as costs can vary widely depending on your choices. Here are the primary factors that influence your expenses:
- Materials: Treated pine is the most affordable option, costing around $200–$300 per square meter, while hardwoods like Kwila or Vitex can cost $400–$500 per square meter. Composite decking, a low-maintenance option, falls in a similar price range to hardwoods.
- Size: Naturally, a larger deck will cost more due to increased materials and labor.
- Labor Costs: If you’re hiring professionals, expect to pay $50–$80 per hour, depending on their experience and the complexity of the design.
- Additional Features: Adding railings, stairs, or built-in seating will add to the overall cost.
Simple Budget Formula:
To estimate your deck’s cost, use this formula:
Cost = Size (in m²) x Material Cost per m² + Labor Costs
For example, a 20-square-meter deck made from treated pine, with professional installation, might cost:
(20 x $250) + ($60/hour x 40 hours) = $5,000 + $2,400 = $7,400
Keep in mind, DIY projects can significantly reduce labor costs, but you’ll need to account for tool rentals or purchases.
Choosing the Right Location
The location of your deck is another critical factor in planning. A well-placed deck enhances usability, comfort, and the overall appeal of your outdoor space. Here’s what to consider:
- Sunlight: Think about how much sunlight your deck will receive throughout the day. A north-facing deck will get more sun, which is great for warmth but may require shading options like a pergola or umbrella during summer.
- Wind: If your property is exposed to strong winds, consider building your deck in a sheltered area or incorporating windbreaks like screens or planting hedges.
- Access Points: Place your deck near commonly used areas of the house, such as the living room or kitchen, to make it more functional. Easy access to the garden or yard can also make your deck more versatile.
- New Zealand’s Climate: NZ’s diverse climate means you’ll need durable materials. Treated pine and hardwoods are great options for withstanding moisture, while composite decking is ideal for high UV exposure areas due to its resistance to fading and cracking.
Pro Tip: Mark out the location of your deck with string or stakes and observe the area for a few days to see how sunlight and wind affect it at different times of the day. This small step can save you from future regrets about the placement.
By carefully planning your deck with these steps, you’ll be setting a strong foundation for a project that not only meets your functional and aesthetic needs but also complies with NZ regulations and stands the test of time. With a clear purpose, adherence to the rules, a realistic budget, and a well-chosen location, you’ll be well on your way to building the deck of your dreams.
Choosing Materials For Your Deck: What You Need To Know
The materials you choose for your deck play a vital role in its durability, appearance, and maintenance requirements. In New Zealand, the weather can be tough on outdoor structures, so selecting the right materials is critical. From wood options to composite decking, fasteners, and tools, this section will help you make informed decisions to ensure your deck stands the test of time.
Wood Options Popular in NZ
- Pine:
Treated pine is the most commonly used decking material in New Zealand, thanks to its affordability and availability. Pine is lightweight and easy to work with, making it ideal for DIY projects. However, because untreated pine is vulnerable to rot and pests, it’s essential to choose pressure-treated pine that complies with NZ standards. Look for grades such as H3.2, which is designed for above-ground outdoor use and offers protection against moisture and decay.- Key Benefits: Affordable, easy to source, and versatile.
- Things to Consider: Requires regular maintenance, including staining or sealing every 1–2 years, to prolong its lifespan.
- Hardwoods (e.g., Kwila, Vitex):
Hardwoods are a premium choice for decking and are highly valued for their natural beauty, rich tones, and incredible durability. Kwila is particularly popular in NZ, as it’s resistant to rot and insects. Similarly, Vitex offers a lighter color and a smooth finish, perfect for a modern aesthetic. While hardwoods can last 25+ years with proper care, they come at a higher upfront cost.- Key Benefits: Extremely durable, visually appealing, and long-lasting.
- Things to Consider: Higher cost and more difficult to work with due to their density. Some hardwoods may not be sustainably sourced, so look for FSC-certified options to ensure eco-friendliness.
- Composite Decking:
Composite decking is a modern solution designed for those seeking low-maintenance and high-durability materials. Made from a mix of wood fibers and recycled plastics, composite decking is resistant to moisture, fading, and cracking, making it an excellent choice for New Zealand’s diverse weather conditions. Available in a variety of colors and finishes, it offers a sleek and consistent look.- Key Benefits: Low maintenance, resistant to rot and UV damage, and eco-friendly due to its recycled components.
- Things to Consider: Higher upfront cost compared to treated pine. Some brands may heat up under direct sunlight, so choose lighter colors if this is a concern.
Pros and Cons of Each Material
Each decking material offers unique advantages and considerations. Treated pine is an affordable and versatile choice but requires regular maintenance to prevent wear and tear. Hardwoods like Kwila and Vitex are exceptionally durable and visually striking but are more expensive and labor-intensive to work with. Composite decking, on the other hand, offers a modern, low-maintenance alternative but comes with a higher initial cost.
Eco-Friendly Tip: For sustainability, choose certified timber like FSC (Forest Stewardship Council) hardwoods or opt for composite decking made from recycled plastics. Supporting sustainable practices not only benefits the environment but can also appeal to buyers if you ever decide to sell your home.
Fasteners and Fixtures
The quality of your deck doesn’t just depend on the wood or decking material—it also relies on the fasteners and fixtures holding everything together. In New Zealand, where many homes are near coastal areas, using corrosion-resistant materials is a must.
- Nails and Screws: Always choose galvanized or stainless-steel nails and screws to prevent rust, especially in high-moisture or salt-laden air. Stainless steel is ideal for coastal areas, as it offers superior resistance to corrosion.
- Brackets and Joist Hangers: These metal components provide structural support for your deck. Look for brackets treated with protective coatings like zinc or powder finishes to extend their lifespan.
- Hidden Fastening Systems: For a cleaner, more polished look, consider hidden fasteners that secure boards without visible nails or screws on the surface. This option works well with composite decking.
Pro Tip: Avoid using untreated or standard-grade fasteners, as they can quickly deteriorate in NZ’s humid and coastal climates, leading to structural weaknesses and costly repairs.
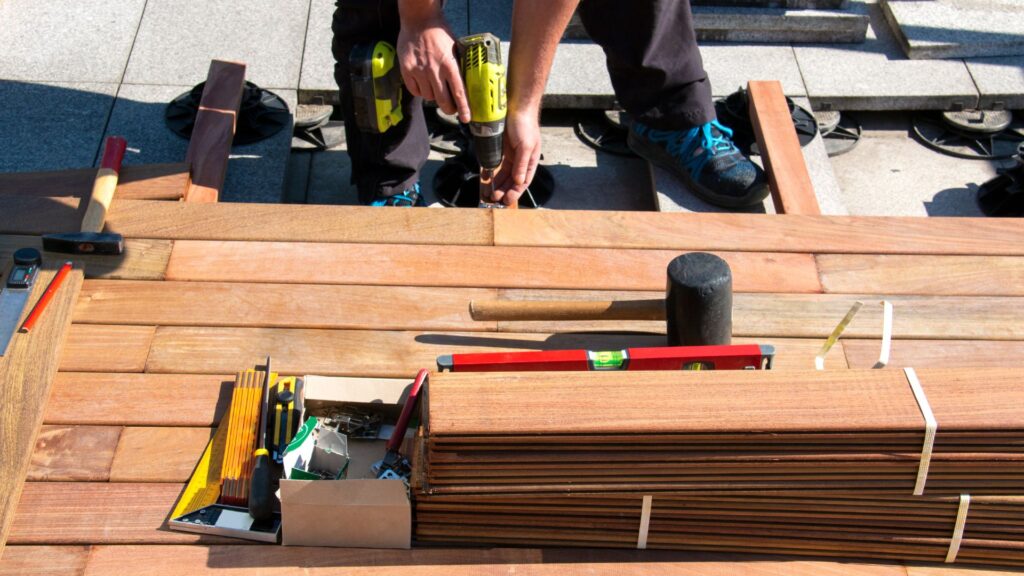
Tools You’ll Need
Building a deck requires a variety of tools to ensure precision and structural integrity. Here’s a checklist of the essential tools you’ll need for the job:
- Power Saw: For cutting decking boards and framing materials to the required lengths. A circular saw or mitre saw is ideal.
- Level: Ensures your deck is perfectly even and stable. A spirit level or laser level works best.
- Measuring Tape: Accurate measurements are crucial for cutting wood and maintaining symmetry.
- Post-Hole Digger: Needed for digging holes for your deck posts, especially if you’re installing footings.
- Hammer or Nail Gun: For securing nails into place, though a nail gun speeds up the process significantly.
- Cordless Drill: Useful for driving screws, assembling frames, and securing fasteners.
- Clamps: Hold materials in place while cutting or fastening.
- Safety Gear: Don’t forget safety glasses, gloves, and ear protection to keep yourself safe while working.
By understanding your material options, their pros and cons, the importance of quality fasteners, and having the right tools on hand, you’ll be well-equipped to start your decking project. Selecting the best materials for your needs and New Zealand’s climate ensures your deck will be not only functional but also a stunning and long-lasting addition to your outdoor space.
Step-By-Step Guide To Building Your Deck
Building a deck can feel like a daunting task, but with the right approach, tools, and attention to detail, you can create a beautiful and functional outdoor space. Below is a detailed, step-by-step guide to help you build your deck from start to finish. Whether you’re a DIY enthusiast or a first-timer, these steps will ensure your deck is safe, sturdy, and ready to enjoy.
Step 1: Design Your Deck
The first step in any deck-building project is to plan your design. A well-thought-out deck design not only meets your needs but also complements your home’s architecture and outdoor space.
- Sketch Your Plan: Use graph paper or online deck design tools to create a detailed sketch of your deck. Include dimensions, locations for posts, stairs, and railings, and any additional features like built-in seating. Free online tools like SketchUp or specific deck design apps can make this process easier.
- Calculate Square Footage: Multiply the length and width of your deck to calculate its square footage. This helps determine the amount of materials you’ll need and ensures your deck is proportional to your outdoor space.
- Consider Layout Tips: Keep traffic flow in mind—ensure there’s enough space for furniture, walking paths, and door clearance. If your deck will host outdoor gatherings, consider creating zones for dining, lounging, and cooking.
Step 2: Preparing the Site
Once you have your design, it’s time to prepare the site. Proper site preparation lays the groundwork for a level, stable, and durable deck.
- Mark Out the Area: Use stakes and string to outline the deck’s perimeter. Double-check measurements against your design to ensure accuracy.
- Clear the Ground: Remove grass, plants, and debris from the area. For added stability, consider excavating 50–100mm of soil and replacing it with gravel to prevent moisture buildup.
- Level the Site: Use a long level and a straight board to check for uneven ground. Level the area as needed by adding or removing soil.
- Important Tip: Before you dig for footings or posts, call before you dig! In New Zealand, use the free service BeforeUDig NZ to check for underground utilities like gas, water, and power lines. This ensures safety and prevents costly damage.
Step 3: Installing the Foundation
A strong foundation is essential for a sturdy and long-lasting deck. Properly installed posts and footings ensure the deck can withstand heavy loads and adverse weather conditions.
- Install Deck Posts: Use treated timber posts rated for outdoor use (H4 or higher). Dig holes to the required depth (typically 600mm for NZ conditions) and set the posts in place using concrete. Ensure they are level and spaced according to your design.
- Footings for Stability: Footings distribute the weight of the deck and prevent settling over time. Use concrete footings or adjustable post anchors to keep the deck stable and secure.
- Spacing Matters: Ensure your posts and footings are evenly spaced to provide adequate support for the joists and beams. The spacing depends on your deck size and the type of wood you’re using.
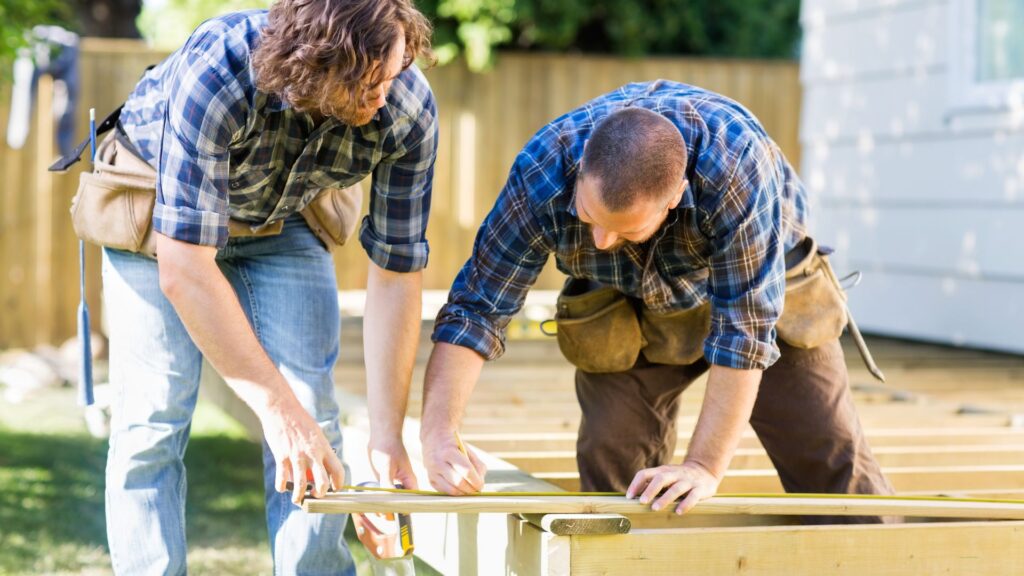
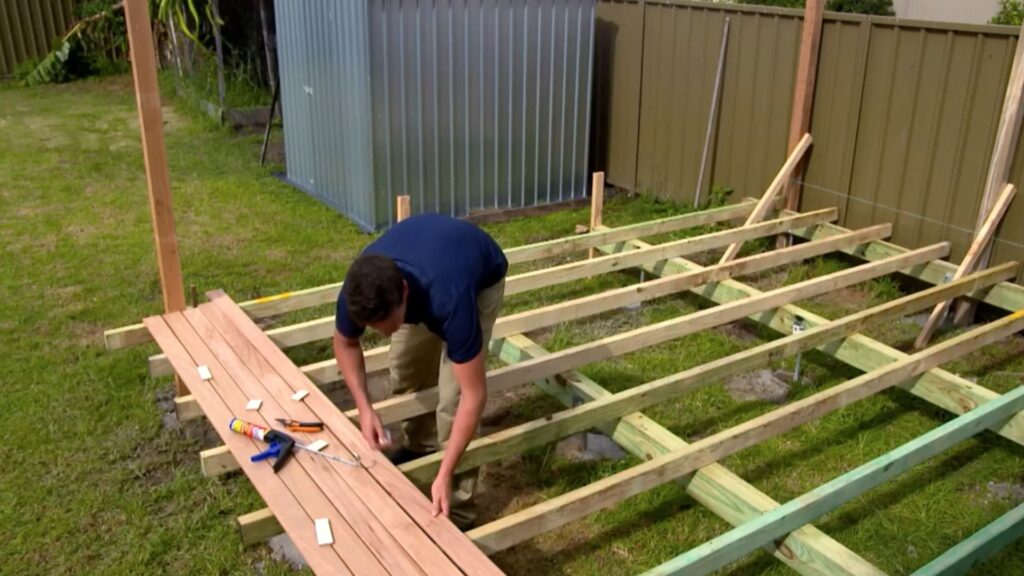
Step 4: Building the Frame
The frame is the backbone of your deck, providing structural support and determining its overall strength and stability.
- Assemble the Joists and Beams: Begin by attaching the beams to the posts using galvanized brackets or hardware. Then, install the joists, ensuring they are evenly spaced (typically 400mm–450mm apart).
- Check for Levelness: Use a spirit level to ensure all beams and joists are level. A level frame ensures the decking boards will lie flat and prevents future issues like warping or gaps.
- Square the Frame: Measure diagonally from corner to corner to ensure the frame is square. Adjust as needed before securing everything in place.
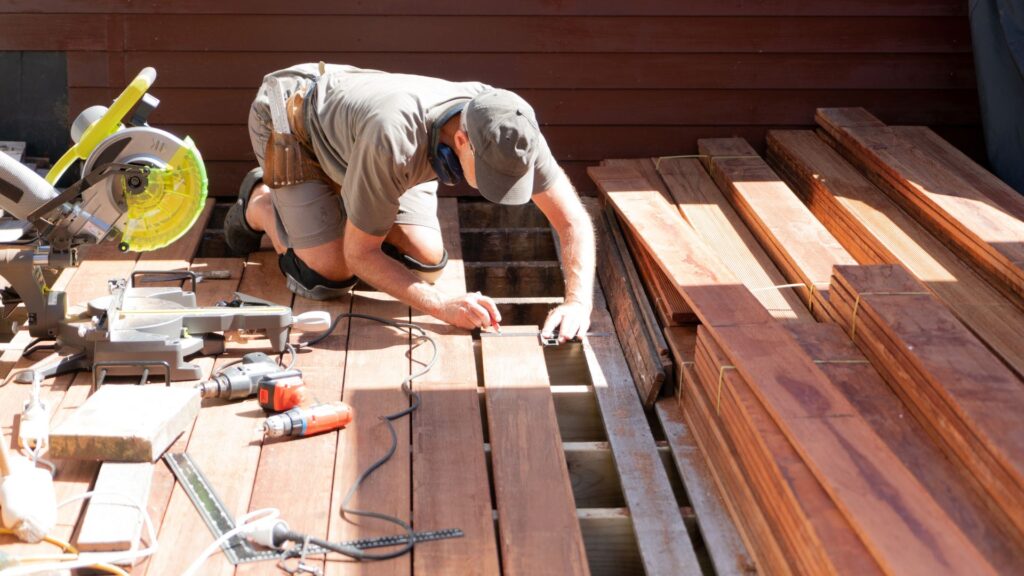
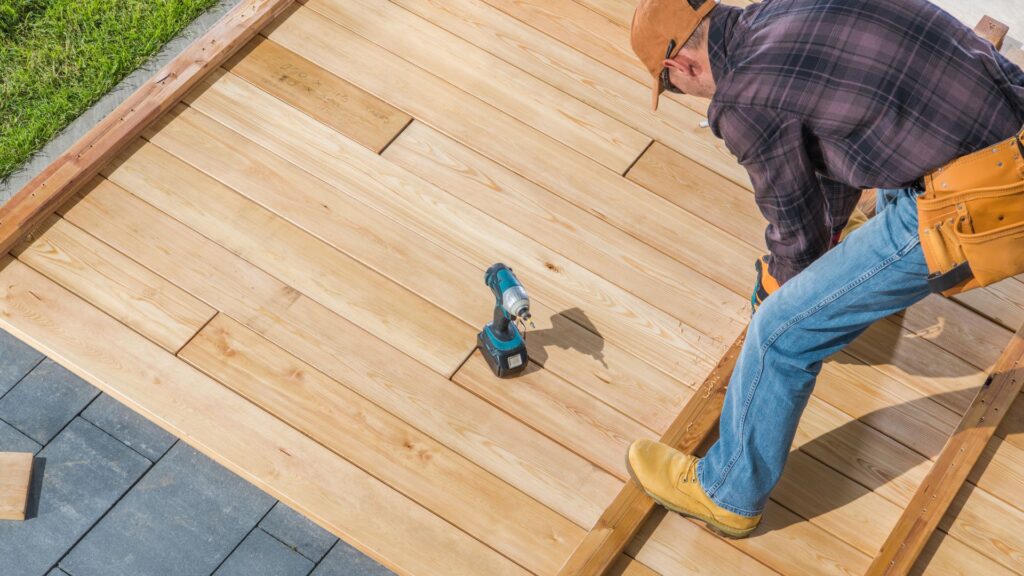
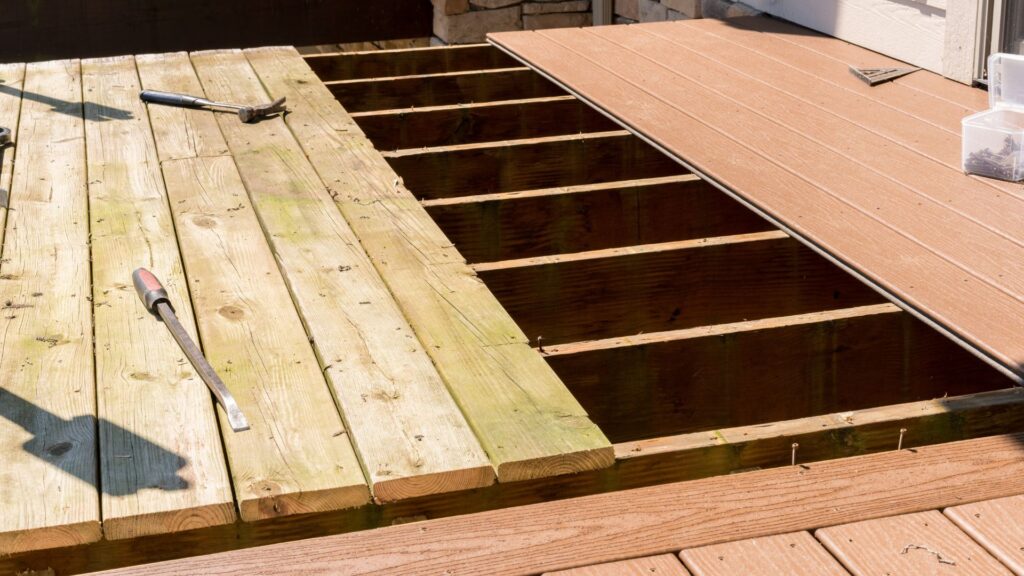
Step 5: Laying the Decking Boards
With the frame complete, it’s time to lay the decking boards. This step requires precision to ensure an even and professional-looking finish.
- Start at the Outer Edge: Begin by laying the first board along the outer edge of the frame. Use a chalk line to guide placement and ensure straight alignment.
- Space Boards Properly: Leave a small gap (3–5mm) between boards to allow for drainage and natural expansion due to weather changes.
- Secure with Fasteners: Use galvanized or stainless-steel screws to attach the boards to the joists. Avoid nails, as they can loosen over time.
- Tips for Durability: Stagger the ends of the boards to avoid creating weak spots, and pre-drill holes to prevent splitting, especially with hardwoods.
Step 6: Adding Railings and Stairs (Optional)
If your deck is elevated or includes multiple levels, railings and stairs may be necessary for safety and accessibility.
- Install Railings: Attach posts to the frame, then add horizontal rails and balusters. Ensure the railing height complies with NZ building codes (typically 1 meter for decks over 1.5 meters high).
- Build Stairs: For stairs, use stringers to support the treads. Ensure the risers and treads are evenly spaced and securely fastened.
- Safety First: Railings and stairs must meet New Zealand’s building regulations. Refer to Building Performance NZ for detailed guidelines.
Step 7: Finishing Touches
The final step is to enhance your deck’s appearance and protect it from the elements.
- Sanding: Smooth out rough edges or uneven surfaces with a sander. This improves safety and prepares the wood for finishing.
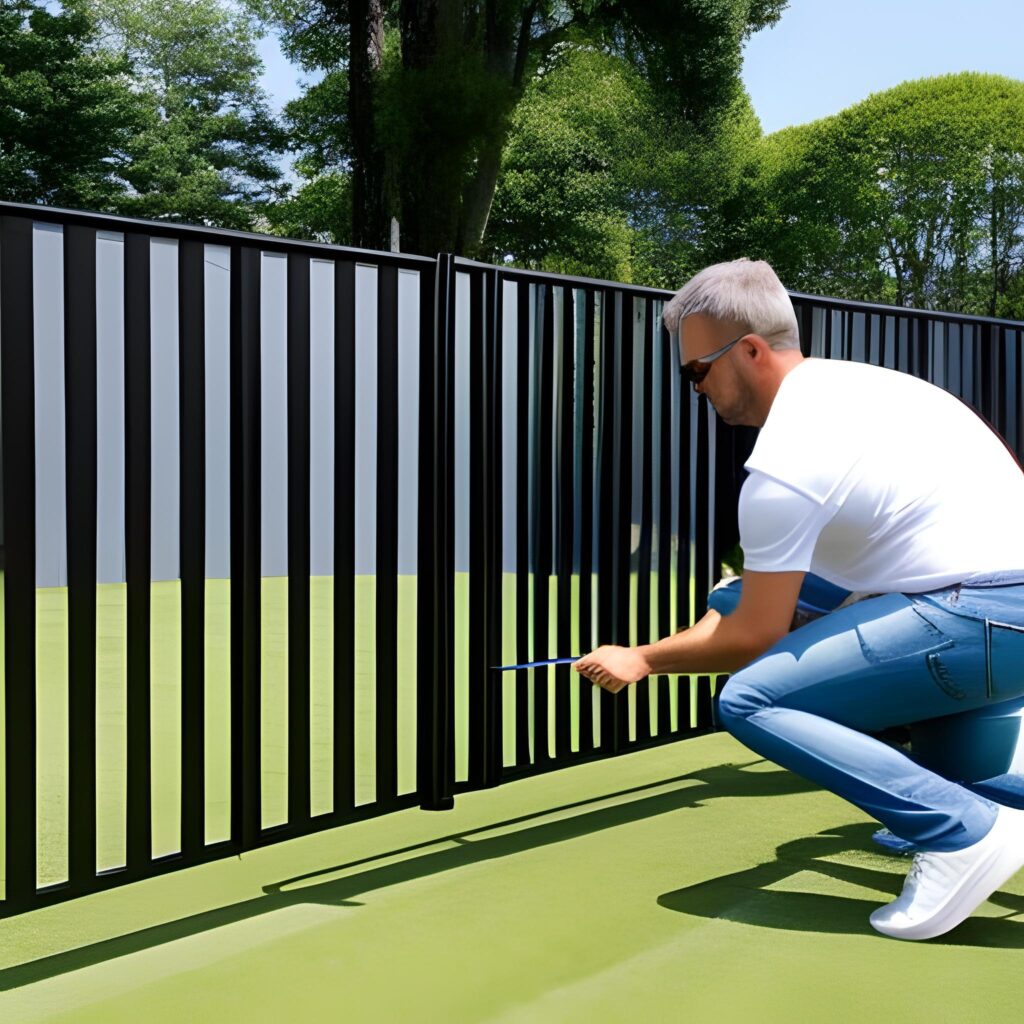
- Staining or Painting: Apply a high-quality deck stain, oil, or paint to protect the wood from UV rays, moisture, and wear. Choose finishes designed for outdoor use in NZ’s climate.
- Regular Maintenance: To prolong your deck’s life, clean it regularly to remove dirt and debris. Reapply stain or sealant every 1–2 years to maintain its appearance and durability.
By following this step-by-step guide, you’ll be well on your way to creating a beautiful, functional deck that enhances your outdoor living space. Remember to plan carefully, work methodically, and prioritize safety at every stage of the process. A well-built deck not only adds value to your home but also provides a space for years of enjoyment.
Maintenance Tips For Your Deck: Keep It Looking Great Year-Round
A well-maintained deck not only enhances the aesthetic appeal of your outdoor space but also extends its lifespan. Whether your deck is made of treated wood, hardwood, or composite materials, regular care ensures it remains safe, sturdy, and beautiful despite New Zealand’s diverse and sometimes harsh climate. Below is a comprehensive guide to deck maintenance, tailored to different materials and weather conditions.
How to Keep Your Deck Looking Great Year-Round
To maintain a stunning deck, routine care is essential. Here’s how to keep your deck in top condition throughout the seasons:
- Routine Sweeping and Debris Removal:
Sweep your deck regularly to remove dirt, leaves, and debris. Accumulated organic matter can trap moisture, leading to mold, mildew, and premature wear, particularly in NZ’s humid regions. - Preventative Cleaning:
Schedule a deep clean at least twice a year—once in spring to prepare for summer and once in autumn to protect it through winter. A clean deck not only looks great but also prevents long-term damage. - Protection from Furniture and Foot Traffic:
Place protective pads under outdoor furniture legs to avoid scratches and dents on the decking surface. Regularly rearrange furniture and rugs to prevent uneven wear and fading, especially in decks exposed to high UV levels.
Cleaning Tips for Different Materials
The method and frequency of cleaning depend on the type of material used for your deck. Here’s how to clean wood and composite decking effectively:
- For Wood Decks (Treated Pine, Hardwood):
- Mild Cleaning: Use a soft-bristle brush and a mixture of warm water and mild dish soap to scrub the surface. Rinse thoroughly with a garden hose or pressure washer on a low setting.
- Deep Cleaning: For stubborn stains or mold, use a commercial wood deck cleaner or a DIY solution of 1 part vinegar to 3 parts water. Avoid using bleach as it can weaken the wood fibers.
- Precaution: Ensure all cleaning solutions are rinsed off to prevent residue that might damage the wood.
- For Composite Decks:
- Regular Cleaning: Sweep away dirt and debris regularly to prevent scratching the surface.
- Soap and Water: Use warm, soapy water and a soft cloth or sponge to clean the boards. Avoid abrasive cleaners or tools that might damage the composite material’s finish.
- Mold Prevention: Composite decks are resistant to mold but not immune. Ensure proper drainage and ventilation around the deck to prevent moisture buildup.
Tip: Always test cleaning products on a small, inconspicuous area before applying them to the entire deck.
Staining or Sealing Schedules Based on NZ’s Climate
In New Zealand, where UV exposure, humidity, and rain vary by region, regular staining or sealing is crucial to protect wood decks. Here’s how to plan your maintenance schedule:
- Treated Pine Decks:
- Apply a stain or sealant every 12–18 months to protect against UV rays and moisture. Choose a product specifically designed for NZ’s climate, such as oil-based stains for better penetration.
- Hardwood Decks (Kwila, Vitex):
- Hardwood decks generally require less frequent staining. Reapply oil or stain every 18–24 months to maintain their natural color and protect them from drying out.
- Composite Decks:
- Composite decking doesn’t require staining or sealing, making it a low-maintenance option. However, you should clean it regularly and inspect for any surface damage.
Pro Tip: Over time, weathered wood can become gray or dull. Applying a wood brightener before staining can restore its natural beauty and enhance the final finish.
Warning Signs to Look For
Regular inspections are vital to catch potential issues early and address them before they become serious. Here’s what to watch out for:
- Rot and Decay:
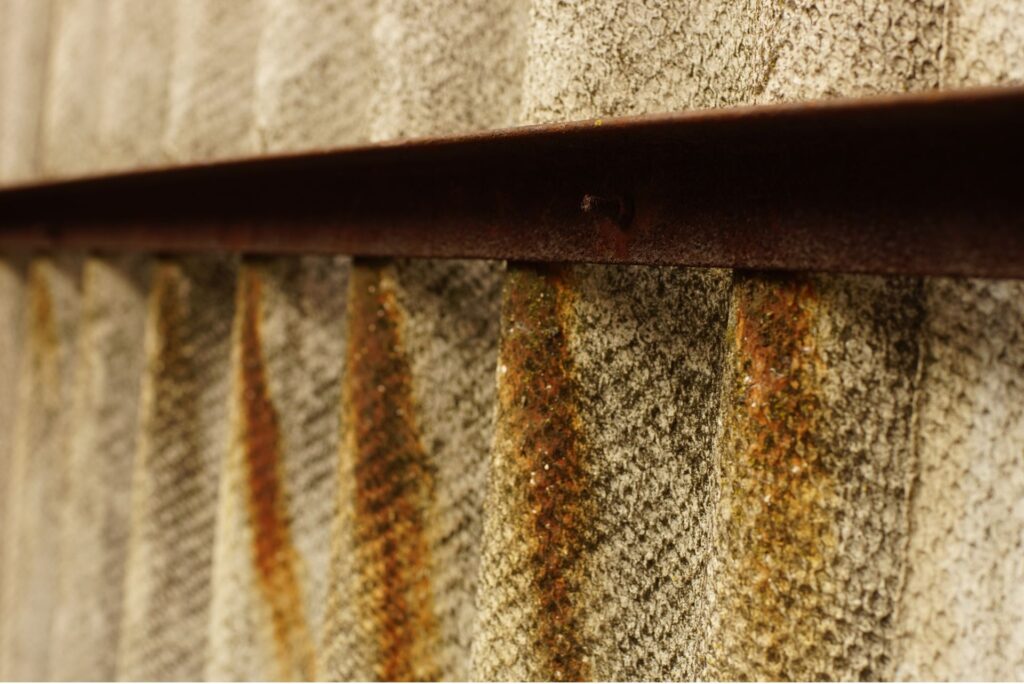
Look for soft spots, discoloration, or wood that feels spongy underfoot—these are signs of rot. Rot often starts in areas exposed to moisture or poor drainage, such as around fasteners or under planters. - Rust on Fasteners:
Check nails, screws, brackets, and other metal components for rust or corrosion, especially in coastal areas where salt air can accelerate wear. Replace any rusted fasteners promptly to prevent structural weakening. - Loose Boards or Railings:
Walk around your deck and check for boards that feel unstable or railings that wobble. Tighten screws or replace damaged hardware to ensure safety. - Cracks or Splits in Wood:
Cracks are common in aging wood decks and can worsen over time, allowing water to seep in and cause further damage. Sand down small cracks and apply a sealant to prevent them from spreading.
By incorporating these maintenance tips into your routine, you can ensure your deck remains an attractive, functional, and safe space for years to come. Regular cleaning, timely staining or sealing, and close attention to warning signs will protect your investment and allow you to enjoy the outdoor lifestyle New Zealand is famous for.

Common Mistakes To Avoid When Building A Deck
Building a deck is a rewarding project that can transform your outdoor space, but it requires careful planning and execution to ensure durability, safety, and compliance with local regulations. Avoiding common mistakes during the construction process can save you time, money, and potential headaches in the future. Below, we’ll outline the most frequent pitfalls homeowners face when building a deck and how to avoid them.
Not Checking for Building Consents
One of the biggest mistakes people make is skipping the step of checking for building consents. In New Zealand, any deck higher than 1.5 meters above the ground requires a building consent from your local council. Even if your deck is lower than 1.5 meters, other factors—such as proximity to boundaries or the addition of railings and stairs—might still necessitate consent.
Why It’s Important:
Building without the required consent can lead to fines, complications when selling your home, or even the need to dismantle the deck entirely. Compliance ensures your deck meets safety standards and is structurally sound.
How to Avoid This Mistake:
- Check with your local council or refer to the Building Performance NZ website for guidelines specific to your area.
- If you’re unsure whether your project requires consent, consult a qualified builder or a building professional.
- Ensure your design complies with New Zealand’s building codes before construction begins.
Using Untreated Wood in High-Moisture Areas
New Zealand’s climate, with its high humidity and frequent rain in some regions, can take a toll on outdoor structures. Using untreated or improperly treated wood is a common mistake that leads to rot, decay, and structural failure over time.
Why It’s Important:
Untreated wood is not resistant to moisture, insects, or fungi, making it unsuitable for outdoor use. Decks built with untreated wood may require expensive repairs or complete replacement within a few years.
How to Avoid This Mistake:
- Choose wood that is pressure-treated for outdoor use. In NZ, H3.2-treated timber is ideal for above-ground decking, while H4-treated timber is recommended for posts that come into contact with the ground.
- Avoid budget materials that aren’t designed to withstand moisture, even if they seem cost-effective initially.
- For added durability, apply a water-resistant stain or sealant to protect the wood from NZ’s harsh weather conditions.
Poorly Spaced or Uneven Decking Boards
Improperly spaced or uneven decking boards can result in an unattractive finish and practical issues down the line. Boards that are too close together can trap moisture, leading to rot, while boards spaced too far apart may create gaps that are unsafe or visually unappealing.
Why It’s Important:
Correct spacing allows for proper drainage, minimizes the risk of water damage, and accommodates natural wood expansion and contraction caused by temperature changes. Uneven boards not only look unprofessional but can also cause tripping hazards.
How to Avoid This Mistake:
- Use spacers or a consistent measuring tool to ensure even gaps between boards. A typical spacing of 3–5mm is recommended for wood, while composite decking may require specific spacing per the manufacturer’s instructions.
- Pre-plan the layout of your decking boards to avoid awkward cuts or mismatched joints.
- Regularly check alignment with a chalk line or straight edge as you install the boards to maintain consistency.
Ignoring Proper Drainage
One of the most overlooked aspects of deck building is planning for proper drainage. Without adequate drainage, water can accumulate on or around your deck, leading to premature rot, mold growth, and structural instability. This is particularly critical in New Zealand, where frequent rain and damp conditions are common.
Why It’s Important:
Poor drainage can compromise the longevity of your deck and the foundation beneath it. It can also make the deck slippery and unsafe for use, especially during the wetter months.
How to Avoid This Mistake:
- Ensure the decking boards are installed with a slight gap between them to allow water to drain through.
- Design the deck with a gentle slope (1–2%) away from your home to prevent water pooling near the foundation.
- Install proper drainage systems beneath the deck, such as gravel beds, to channel water away from the structure.
- Avoid placing planters or furniture directly on the deck without proper drainage trays, as these can trap water and damage the boards.
By avoiding these common mistakes, you can build a deck that is not only visually appealing but also durable, safe, and compliant with New Zealand’s building regulations. Taking the time to check for building consents, selecting the right materials, ensuring proper spacing, and addressing drainage will help you create an outdoor space that stands the test of time. Planning ahead and paying attention to these details will save you from costly repairs and ensure your deck remains a source of enjoyment for years to come.
Alternatives To DIY: When To Call A Professional For Building Your Deck
While building a deck yourself can be a rewarding and cost-effective project, there are certain scenarios where enlisting the help of a professional is the smarter choice. Professional deck builders bring expertise, efficiency, and a level of precision that’s hard to match, especially for complex projects. Here’s a detailed breakdown of when you might want to hire a pro, what it typically costs in New Zealand, and the key benefits of a professionally built deck.
When to Call a Professional
There are situations where the complexity or scope of the project makes DIY challenging or even risky. Consider hiring a professional in the following scenarios:
- Steep or Uneven Slopes:
Building a deck on sloped or uneven ground requires advanced techniques to ensure structural stability. Professionals can install properly reinforced posts and footings to handle the challenges posed by uneven terrain, ensuring the deck is safe and level. - Multi-Level Decks:
Multi-level decks add visual interest and functionality, but they require careful planning and structural expertise. Professionals can design and construct these decks to meet New Zealand building codes and ensure the transitions between levels are smooth and secure. - Complex Features:
If you want to incorporate features like built-in seating, stairs, railings, or lighting, a professional can ensure these elements are integrated seamlessly. They’ll also know how to comply with NZ regulations for features like balustrades and staircases. - Time Constraints:
If you’re short on time, hiring a professional can save weeks of effort. Professionals have the experience and tools to complete a project much faster than a DIY approach. - Large-Scale Projects:
Building a large deck involves significant material handling, precise measurements, and coordination. Professionals are equipped to handle the workload efficiently, ensuring the project is completed on time and within budget. - Building Consents:
If your deck requires building consent (e.g., it’s over 1.5m high), professionals can handle the paperwork, ensure compliance with regulations, and even liaise with local councils on your behalf.
Average Costs of Hiring a Deck Builder in NZ
The cost of hiring a professional deck builder in New Zealand depends on several factors, including the size, materials, and complexity of the project. Here’s a general idea of what to expect:
- Cost Per Square Meter:
- Treated Pine Decks: $300–$450 per square meter.
- Hardwood Decks (e.g., Kwila): $400–$600 per square meter.
- Composite Decking: $500–$700 per square meter.
- Additional Costs:
- Custom Features: Adding stairs, railings, or multi-levels will increase the overall cost. For example, installing railings may cost $50–$100 per linear meter.
- Site Preparation: If your site requires excavation, leveling, or removing old structures, expect to pay extra for these services.
- Overall Project Costs:
For an average-sized deck of 20 square meters, you might spend $6,000–$12,000, depending on the materials and complexity.
While these costs may seem high compared to DIY, it’s important to factor in the time saved, the quality of craftsmanship, and the peace of mind that comes with hiring a professional.
Benefits of a Professionally Built Deck
Investing in a professionally built deck comes with several advantages that go beyond the initial construction process:
- Warranty and Guarantees:
Most professional deck builders offer warranties on their work, covering defects in craftsmanship or materials for a specified period. This means if anything goes wrong, you’re protected without additional costs. - Structural Integrity:
Professionals have the expertise to ensure the deck is built to last. From proper post anchoring to precise joist spacing, every element is constructed to withstand heavy use and New Zealand’s challenging weather conditions. - Compliance with NZ Building Codes:
Professionals are well-versed in New Zealand’s building regulations. They’ll ensure your deck meets safety standards, which is especially important if you’re building a high or multi-level deck. - Custom Design Expertise:
Professionals can bring creative design ideas to the table and help you achieve a deck that enhances the aesthetics and functionality of your outdoor space. They can incorporate features you might struggle with as a DIYer, such as integrated lighting or pergolas. - Time and Effort Savings:
Building a deck is a labor-intensive project that requires precise planning, tools, and experience. Hiring a professional allows you to focus on other priorities while they handle the heavy lifting. - Increased Property Value:
A professionally built deck adds value to your property, not just because of its appearance but also due to its compliance with building codes. Potential buyers will feel reassured knowing the deck was built by experts.
While DIY deck building can be a fulfilling project, there are times when calling a professional is the wisest choice. Whether it’s due to the complexity of the design, the need for speed, or ensuring compliance with NZ regulations, professionals bring a level of expertise that guarantees a high-quality outcome. Though the upfront cost may be higher, the long-term benefits of structural integrity, safety, and enhanced property value make it a worthwhile investment. If you’re unsure about tackling the project yourself, don’t hesitate to reach out to experienced deck builders for advice or a quote—you’ll be glad you did.
Start your deck project today with expert guidance, top-quality materials, and compliance with NZ regulations. Visit our Fence and Gate Auckland for more inspiration, step-by-step guides, and trusted suppliers to bring your vision to life!
FAQs: About How To Build A Deck NZ
Do I need building consent to build a deck in New Zealand?
Building consent is required if your deck is more than 1.5 meters above the ground. For decks lower than this, consent may not be necessary, but you should always check with your local council to ensure compliance with regulations.
What is the best wood to use for building a deck in NZ?
Treated pine is the most popular choice due to its affordability and durability. Hardwoods like Kwila and Vitex are excellent for long-lasting decks, while composite materials are ideal for low-maintenance options.
How much does it cost to build a deck in New Zealand?
The cost depends on the size, materials, and complexity of the design. On average, you can expect to pay $300–$600 per square meter for a professionally built deck, while DIY projects may cost less if you already have tools.
Can I build a deck myself, or should I hire a professional?
You can build a deck yourself if you have basic DIY skills and the right tools. However, for complex designs, steep sites, or large decks, it’s best to hire a professional to ensure structural integrity and compliance with building codes.
What tools do I need to build a deck?
Essential tools include a power saw, drill, measuring tape, level, post-hole digger, hammer, and clamps. Depending on your deck design, you may also need additional tools for cutting and shaping materials.
How long does it take to build a deck in NZ?
The timeline depends on the size and complexity of the project. A small, simple deck can take a weekend to complete, while larger or more intricate designs may take a week or more.
What are the common mistakes to avoid when building a deck?
Common mistakes include not checking for building consent, using untreated wood, improper spacing between boards, neglecting drainage, and failing to secure the frame correctly. Following a step-by-step guide can help avoid these issues.
How do I maintain my deck in New Zealand’s climate?
Regularly clean your deck to prevent moss and mildew buildup, especially in wet climates. Apply a wood stain or sealant every 1–2 years to protect against UV damage and moisture. Inspect for loose boards or nails periodically.
Can I build a deck on a sloped site?
Yes, you can build a deck on a sloped site by using posts and footings to create a level surface. This may require more planning and effort, so consulting a professional for such projects is recommended.
What’s the best way to ensure my deck complies with NZ building standards?
To ensure compliance, check local building codes before starting, use treated wood or durable materials, and follow the proper procedures for installing posts, framing, and railings. You can also consult your local council or a qualified builder for guidance.
Conclusion
Building a deck is a rewarding project that combines creativity, functionality, and the joy of transforming your outdoor space into a personal retreat. Whether you take on the challenge as a DIY enthusiast or hire a professional, the end result is a beautiful extension of your home that enhances its value and provides a space for relaxation, entertaining, and making memories. The process of designing, planning, and building a deck, while requiring effort, offers a deep sense of satisfaction and accomplishment. If you’ve been inspired by this guide, now is the perfect time to start your project, embrace the journey, and enjoy the rewards of your hard work. We’d love to hear about your deck-building experiences or answer any questions you might have—feel free to share your thoughts in the comments below!
About the Author:
Mike Veail is a recognized digital marketing expert with over 6 years of experience in helping tradespeople and small businesses thrive online. A former quantity surveyor, Mike combines deep industry knowledge with hands-on expertise in SEO and Google Ads. His marketing strategies are tailored to the specific needs of the trades sector, helping businesses increase visibility and generate more leads through proven, ethical methods.
Mike has successfully partnered with numerous companies, establishing a track record of delivering measurable results. His work has been featured across various platforms that showcase his expertise in lead generation and online marketing for the trades sector.
Learn more about Mike's experience and services at https://theleadguy.online or follow him on social media: