Welcome to our comprehensive guide on how to stain a deck in New Zealand! Whether you’re a seasoned DIY enthusiast or a first-timer, maintaining your deck is essential to keep it looking beautiful and protected from the country’s unique climate conditions. With intense UV rays, rain, and ever-changing weather, a properly stained deck not only enhances the appearance of your outdoor space but also ensures it lasts for years to come. In this guide, we’ll walk you through the entire process step-by-step, offering practical tips tailored to New Zealand’s environment, from choosing the right stain to mastering the application techniques for a flawless finish. Let’s dive in and get your deck ready to shine.
To stain a deck in New Zealand, start by choosing the right stain based on your wood type and weather exposure. Clean the deck thoroughly, sand any rough areas, and inspect for repairs. Apply the stain evenly using a brush or roller, working in small sections. Allow proper drying time between coats, and avoid staining in direct sunlight to ensure an even finish. For the best results, stain your deck during a period of mild, dry weather, typically in spring or autumn. Regular maintenance will help preserve the look and longevity of your deck.
- Choosing The Right Deck Stain
- Preparing Your Deck For Staining
- The Best Time To Stain A Deck In New Zealand
- Step-by-Step Guide To Staining A Deck
- Post-Staining Care And Maintenance
- Common Deck Staining Mistakes To Avoid
- FAQs: About How To Stain A Deck NZ
- How often should I stain my deck in New Zealand?
- What is the best time of year to stain a deck in NZ?
- Can I stain a deck over old stain?
- Should I use an oil-based or water-based stain?
- How long should I wait after cleaning the deck before staining it?
- Do I need to sand the deck before staining?
- What is the difference between transparent, semi-transparent, and solid stains?
- How long does it take for the deck stain to dry?
- Can I stain my deck if it's damp?
- How can I maintain my deck after staining?
- Conclusion
Choosing The Right Deck Stain
When selecting a stain, it’s important to consider the type of wood and the weather conditions in your area. If you’re unsure, Mitre 10’s Deck Stain Guide offers a helpful breakdown of stain types and how to choose the best option for your deck. New Zealand’s intense sun, regular rainfall, and humidity can all take a toll on untreated or poorly protected wood. Let’s break down the main options and help you make an informed choice that ensures your deck stays beautiful and durable for years to come.
Types of Deck Stains
There are three main types of deck stains to consider: transparent, semi-transparent, and solid stains. Each type has unique characteristics and offers varying levels of protection and aesthetic outcomes.
- Transparent Stains: These stains provide the least amount of pigment, allowing the natural wood grain to shine through. Transparent stains are great for those who want to preserve the raw, organic look of their deck’s wood. However, because they offer minimal pigmentation, they provide the least amount of UV protection. In a place like New Zealand, where the sun’s UV rays are particularly strong, transparent stains may require more frequent reapplication to prevent wood from fading or drying out.
- Semi-Transparent Stains: Offering a balance between showcasing the wood grain and providing color, semi-transparent stains are a popular choice for New Zealand decks. They add a slight tint to the wood while still allowing some of the grain to show through. This type of stain offers better UV protection than transparent stains, which is essential for regions exposed to harsh sunlight. Semi-transparent stains also tend to be more forgiving when it comes to hiding imperfections in the wood.
- Solid Stains: These stains are more like paint, offering full coverage that completely hides the natural grain of the wood. Solid stains are ideal if you want to drastically change the appearance of your deck or if your deck wood has already experienced significant wear and tear. Solid stains provide the highest level of protection from both UV rays and moisture, making them a great option for areas of New Zealand that experience heavy rain or strong sunlight. However, they do require a more rigorous maintenance schedule to avoid chipping or peeling over time.
Choosing the Right Stain for Your Wood Type in NZ
The type of wood your deck is made from will also influence the type of stain you should choose. New Zealand decks are often made from softwoods like treated pine or hardwoods such as Kwila (Merbau).
- Treated Pine: This common softwood requires extra protection due to its tendency to absorb moisture and weather more quickly. A semi-transparent or solid stain is usually a good choice for pine, offering the necessary protection against the elements while enhancing the wood’s appearance.
- Kwila or Other Hardwoods: Kwila is a dense hardwood that naturally resists moisture but is still vulnerable to UV damage. A semi-transparent stain works well for Kwila, as it allows the rich tones of the wood to show through while adding protection from the sun.
Oil vs. Water-Based Stains
Another critical factor in choosing the right deck stain is deciding between oil-based and water-based formulas. Both types have advantages, and your choice will depend on the specific conditions your deck faces.
- Oil-Based Stains: These stains penetrate deeply into the wood, making them a better option for decks exposed to extreme weather conditions, such as harsh sun or heavy rainfall—both of which are common in various parts of New Zealand. Oil-based stains also offer a rich, natural finish and tend to require less frequent reapplication compared to water-based options. However, they can be harder to clean up and tend to take longer to dry, which means you’ll need to be strategic about choosing a good weather window for staining.
- Water-Based Stains: These stains sit more on the surface of the wood and are often easier to apply and clean up. They dry faster, which can be a big plus if you’re in an area that has unpredictable rain. Water-based stains are also more eco-friendly, with fewer fumes and easier clean-up. However, they may not penetrate as deeply into the wood as oil-based stains, meaning they might need more frequent reapplication, especially in areas with harsh sun exposure.
In New Zealand, where UV protection is crucial due to the high sun intensity, oil-based stains generally offer longer-lasting results. However, if you prioritize ease of use and a quicker project turnaround, water-based stains may be your best bet, especially if you’re staining in a cooler or more humid area where drying time might be a concern.
Considering Colour Choices
When choosing the color of your deck stain, it’s important to think about how it will complement the rest of your outdoor space and home design. The right color can enhance your deck’s natural beauty and tie together the aesthetics of your backyard, garden, or patio area.
- Natural Wood Tones: If you prefer a more traditional look, stains that bring out the natural wood colors like cedar, oak, or mahogany are popular choices in New Zealand. These shades work well with outdoor spaces that incorporate lots of greenery or earthy tones.
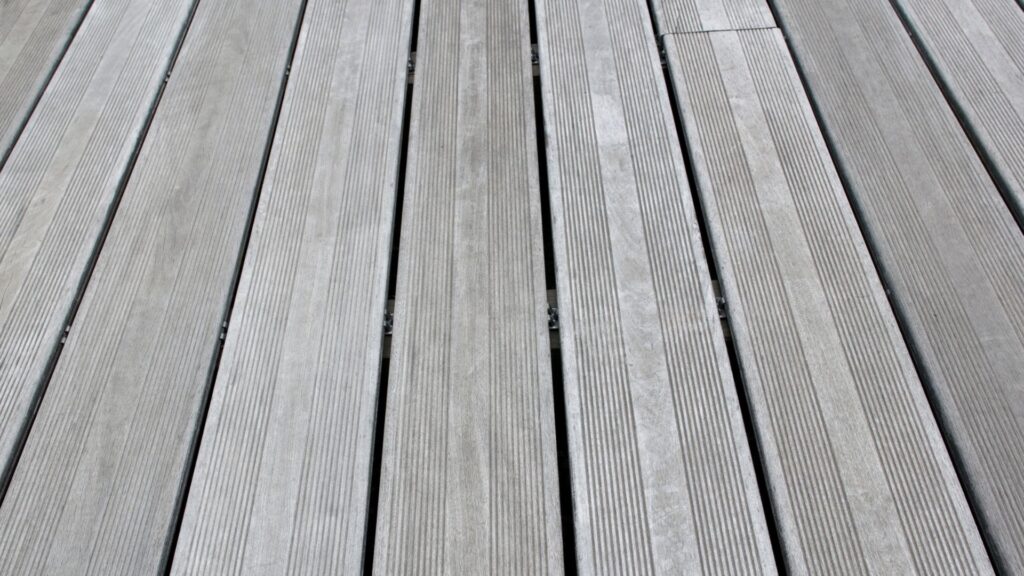
- Gray and Driftwood: These cooler tones have gained popularity in recent years, especially for modern homes or beachside properties. Gray stains can give your deck a more contemporary feel while also hiding dirt and imperfections well. Driftwood shades are also ideal for creating a coastal vibe, blending seamlessly with the natural environment in places like the Bay of Plenty or the Coromandel Peninsula.
- Bold Colors: If you want your deck to stand out, bold, darker stains like deep browns, reds, or even black can make a statement. These colors offer a striking contrast against bright homes or lush garden spaces, while also providing strong UV protection.
Choosing the right deck stain in New Zealand requires careful consideration of both aesthetic and practical factors. From deciding between transparent, semi-transparent, or solid stains to selecting the perfect color, the stain you choose will not only affect the look of your deck but also its durability in the face of New Zealand’s often challenging weather. By understanding the types of stains available and how they interact with your wood type and climate, you can make a decision that ensures your deck looks beautiful and remains protected for years to come.

Preparing Your Deck For Staining
Before applying any stain to your deck, proper preparation is essential to ensure a smooth, even, and long-lasting finish. Deck preparation involves cleaning, sanding (if necessary), and inspecting for repairs, all of which help ensure the stain adheres properly and protects the wood from New Zealand’s often harsh outdoor conditions. Let’s walk through each step in detail.
Cleaning the Deck
The first and arguably most crucial step in preparing your deck for staining is thorough cleaning. A clean deck ensures that the stain can penetrate the wood evenly, without dirt, mold, or mildew obstructing the process. Over time, debris can accumulate on your deck, especially in New Zealand’s coastal and humid areas, where moisture can encourage the growth of moss or mold. Neglecting this step can lead to an uneven finish or even premature peeling of the stain.
Why Cleaning is Important
Cleaning removes the dirt, grease, and organic matter that might prevent the stain from adhering to the wood. If left uncleaned, these contaminants create a barrier that can cause the stain to settle unevenly, resulting in unsightly patches or streaks. Additionally, mold and mildew, if not removed, can continue to grow beneath the stain, causing discoloration and compromising the wood’s integrity over time.
Tools and Cleaning Products You’ll Need
To properly clean your deck, gather the right tools and products. You’ll need.
- A deck cleaner or mild detergent designed to lift dirt and grime.
- A scrub brush with stiff bristles to help remove stubborn dirt and stains.
- A pressure washer (optional but recommended for deep cleaning), set to a moderate pressure to avoid damaging the wood fibers.
Step-by-Step Process for Cleaning the Deck
1. Clear the Deck: Remove any furniture, plants, or objects from the deck surface to ensure you can clean every inch.
2. Apply Deck Cleaner: Using a deck cleaner specifically designed for outdoor wood surfaces, apply the product as directed on the label. Be sure to cover the entire deck, paying extra attention to areas with built-up dirt or stains.
3. Scrub the Surface: For tough spots, use a stiff-bristled scrub brush to loosen grime. Work in the direction of the wood grain to avoid scratching or damaging the surface.
4. Rinse Thoroughly: If you have a pressure washer, use it to rinse the deck, but be mindful of the pressure setting. Too high a setting can damage the wood. If you don’t have a pressure washer, a garden hose will suffice.
5. Allow the Deck to Dry: Drying time is crucial. In New Zealand’s humid regions, it may take longer for the deck to dry completely compared to dry areas. Ideally, wait at least 24 to 48 hours after cleaning before moving on to the next steps, ensuring the wood is thoroughly dry.
Sanding the Deck (If Necessary)
Sanding isn’t always required, but it’s a critical step when your deck’s surface has rough patches, splinters, or an old stain that has peeled or deteriorated. Sanding helps smooth out the surface, making it easier for the new stain to penetrate and adhere evenly to the wood.
When Sanding is Required
Sanding is particularly important if your deck has visible imperfections, such as splinters or raised grain, which can occur over time due to exposure to the elements. If your deck has been stained before and the previous coat is peeling or flaking, sanding helps remove the old stain and prepares the surface for a new, fresh coat.
What Sanding Achieves
By sanding the deck, you not only smooth out the surface but also open up the wood pores, allowing the stain to penetrate more deeply. This leads to better absorption, ensuring a longer-lasting finish that protects your deck from the sun, rain, and other environmental factors typical in New Zealand.
Sanding Techniques and Choosing the Right Sandpaper Grit
- For softwoods, like pine, commonly used in New Zealand decks, start with 80-grit sandpaper and finish with 120-grit for a smooth surface. For hardwoods, like Kwila, which is also popular, you may need coarser sandpaper (60-grit) initially to tackle the denser wood, followed by 100-grit for a finer finish.
- Always sand in the direction of the wood grain to avoid unsightly scratches that could show through the stain.
- After sanding, thoroughly sweep or vacuum the deck to remove any dust, as lingering debris can interfere with the stain’s ability to bond with the wood.
Inspecting for Repairs
Once your deck is clean and sanded, the next step is to inspect it for any necessary repairs. Over time, weather exposure can cause minor damage to your deck, such as loose nails, cracked boards, or even areas of rot. Addressing these issues before staining ensures that your deck remains safe, stable, and ready for long-term protection.
Signs of Damage to Look For
- Loose Nails or Screws: Over time, nails can loosen or pop out due to the expansion and contraction of the wood. Check for any loose fasteners and hammer them back into place, or replace them with deck screws for a more secure hold.
- Cracks in the Wood: Wood can crack or split as it dries out from sun exposure. Small cracks can be filled with wood filler, while larger cracks or damaged boards may need replacing.
- Rotting Wood: In areas prone to moisture, rot can develop if water has been sitting on the deck surface. Inspect all boards carefully, especially those near the ground or in shaded areas where moisture lingers. Replace any rotting boards before proceeding with staining.
Fixing Minor Repairs
- For loose nails, simply hammer them down or replace them with deck screws, which offer a more permanent solution.
- If you find small cracks or gaps, use a wood filler or epoxy that matches your deck’s material to fill them in. After filling, allow the filler to dry and lightly sand the area to ensure a smooth surface.
- Rotten boards should be replaced entirely. Remove the damaged wood and replace it with new timber of the same type, securing it with screws.
By thoroughly preparing your deck—cleaning, sanding, and making necessary repairs—you’ll set the stage for a smooth staining process and ensure a durable, professional-looking finish that withstands New Zealand’s climate for years to come. Proper preparation is key to protecting your investment and keeping your deck looking beautiful, whether you’re dealing with the harsh sun in summer or the wet winters.

The Best Time To Stain A Deck In New Zealand
When it comes to staining a deck in New Zealand, timing is everything. The country’s unique climate, which can range from sunny and dry to wet and windy in a short span of time, plays a critical role in ensuring your deck stain lasts and looks great. Understanding how the weather affects the staining process is essential for achieving the best results.
Weather Considerations
Weather conditions are one of the most crucial factors to consider when planning to stain your deck. Temperature, humidity, and rain all impact how well the stain absorbs into the wood and how evenly it dries. If you stain your deck under the wrong conditions, you risk the stain not adhering properly, leading to blotchiness, peeling, or a shorter lifespan.
- Temperature: The ideal temperature for staining a deck is typically between 10°C and 30°C. Temperatures below this range can slow down the drying process, while higher temperatures may cause the stain to dry too quickly, leading to uneven coverage and lap marks. It’s important to avoid staining on extremely hot days, especially in direct sunlight, as the heat can cause the stain to dry before it has a chance to properly penetrate the wood.
- Humidity: High humidity can interfere with the drying process, especially in coastal areas of New Zealand where moisture levels are often higher. Humid conditions cause the stain to take longer to dry, increasing the chances of dust, dirt, or debris sticking to the wet surface. Conversely, in very dry conditions, the wood might absorb the stain too quickly, making it difficult to achieve an even coat. Aim for a day with moderate humidity levels to give the stain time to soak into the wood properly and dry evenly.
- Rain: Rain is the ultimate enemy when it comes to staining a deck. If it rains shortly after applying the stain, the moisture can wash away the stain, leaving you with patchy, uneven results. It’s crucial to choose a period of dry weather, allowing the stain ample time to dry and cure. Ideally, you should have at least 48 hours of dry conditions after staining. In some cases, you may need to wait even longer for full curing, especially in more humid regions.
Best Seasons to Stain a Deck in NZ
The best time to stain a deck in New Zealand typically falls during the spring and autumn months. These seasons offer the most favorable weather conditions—mild temperatures and more stable weather patterns—compared to the intense summer heat or unpredictable winter rains.
- Spring (September to November): Spring is an excellent time to stain your deck as temperatures begin to rise, but aren’t yet too hot. The increased daylight hours and moderate weather provide ample time for the stain to dry and cure. Additionally, giving your deck a fresh coat of stain in the spring ensures it’s protected from the upcoming summer UV exposure.
- Autumn (March to May): Autumn is another ideal time for staining. As the summer heat fades, the temperatures cool down, and humidity tends to be lower. Staining in autumn also prepares your deck for the wetter winter months, ensuring the wood is sealed and protected from moisture damage.
Summer can work in some regions, especially in cooler parts of the South Island, but you must be cautious of high temperatures and dry conditions that can affect the drying process. Similarly, winter staining is generally not recommended due to the higher likelihood of rain and dampness, which can extend drying times and affect the overall finish.
How to Check Weather Forecasts and Choose the Perfect Window for Staining
Choosing the perfect time to stain your deck involves more than just looking outside and hoping for clear skies. You’ll need to closely monitor weather forecasts to ensure you have the ideal window of opportunity. Here are some practical steps to take.
- Use Reliable Weather Forecasts: Check reputable weather forecasting services such as MetService or NIWA for the most accurate and up-to-date information. These forecasts will give you insights into temperature, humidity, and precipitation probabilities over the next few days.
- Plan for Dry Conditions: Look for a stretch of at least 48 to 72 hours with dry weather. This gives you enough time to clean, prepare, stain, and let the stain cure without interference from rain. Even if the forecast looks good for a single day, it’s safer to wait for several consecutive dry days to ensure the best results.
- Consider Morning vs. Afternoon: When choosing the time of day to apply the stain, aim for early morning or late afternoon, especially if you’re working in summer. Avoid direct midday sun, as it can cause the stain to dry too quickly, resulting in uneven absorption. Cooler parts of the day give the stain time to penetrate the wood evenly before drying begins.
By carefully choosing the right time and weather conditions, you can ensure your deck stain job is not only successful but also long-lasting, giving your deck the protection it needs to withstand New Zealand’s diverse weather patterns.

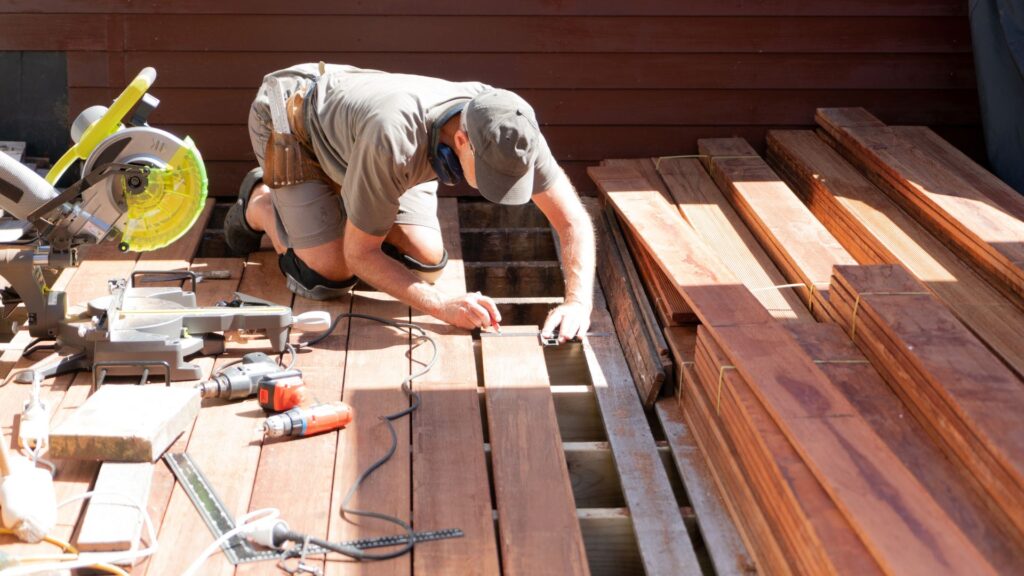
Step-by-Step Guide To Staining A Deck
Materials and Tools You’ll Need
Before you dive into staining your deck, it’s essential to gather the right tools and materials to ensure a smooth and professional finish. Here’s a list of the items you’ll need.
- Deck stain: Choose between oil-based or water-based, depending on your wood type and climate conditions.
- Brushes: High-quality, natural-bristle brushes for oil-based stains or synthetic ones for water-based stains.
- Rollers: A long-handled roller can speed up application, especially for larger decks.
- Drop cloths or plastic sheeting: These will protect the surrounding areas from drips and spills.
- Stir sticks: Ensure even mixing of the stain before application.
- Painter’s tape: To mask off areas where you don’t want the stain to go, such as the sides of your house or nearby fixtures.
Why should you invest in high-quality materials? Using subpar tools or products can lead to uneven application, reduced durability, and a less polished finish. High-quality brushes and rollers ensure the stain is distributed evenly and reaches all areas of the wood, preventing pooling or streaking. Similarly, using the right stain for your deck’s wood type and New Zealand’s climate will help your deck withstand the elements and look great for years to come.
Step 1: Mask and Protect Surrounding Areas
Once you’ve gathered your materials, it’s time to prepare the area. Staining can get messy, and it’s essential to protect nearby plants, furniture, and walls from splatters or overspray. Spread drop cloths or plastic sheeting over any surfaces you want to keep clean, especially if your deck is close to your house or garden.
Use painter’s tape to mask off areas you don’t want stained, like the siding of your house or any decorative features. This step might seem tedious, but it’s crucial for achieving a clean and professional finish. It ensures that the stain only goes where it’s supposed to, preventing any unsightly smudges or marks.
Step 2: Stir and Test the Stain
Before applying the stain, you need to stir it thoroughly. Over time, stain can settle in the can, with pigments sinking to the bottom, which can lead to uneven color distribution if not mixed properly. Use a stir stick to mix the stain, making sure to scrape the bottom of the can to incorporate all the pigments evenly.
It’s also important to test the stain on a small, inconspicuous area of your deck before applying it to the entire surface. Testing ensures the color is what you expect and allows you to check how well the wood absorbs the stain. Different types of wood and previously applied finishes can affect how the stain looks once applied, so testing can prevent any unwanted surprises.
Step 3: Apply the Stain
When it comes to applying the stain, technique is key. You can use a brush, roller, or sprayer, depending on the size of your deck and the type of stain you’re using. Brushes are best for precision work and for getting into cracks and crevices, while rollers or sprayers can help cover large areas quickly.
Start by applying the stain in small sections, following the grain of the wood to ensure an even application. Be mindful of overlapping areas—too much overlap can cause darker patches, while too little can result in streaks. Work methodically from one end of the deck to the other, ensuring you complete one board at a time to avoid visible overlap marks.
One common mistake to avoid is applying too much stain at once, which can lead to pooling. Pooling not only looks unsightly but can also lead to longer drying times and an uneven finish. Wipe off any excess stain as you go to ensure a smooth, even coat.
The weather in New Zealand can also impact your drying times. Depending on the temperature and humidity, the stain can take longer to dry. Make sure you check the weather forecast before starting and aim for a mild, dry day to avoid issues with drying and absorption.
Step 4: Apply a Second Coat (If Needed)
After the first coat has dried, evaluate whether a second coat is necessary. Some stains may only require one coat, especially if they are highly pigmented, while others might need a second layer for added durability and richer color. A second coat can also enhance the wood’s protection against New Zealand’s often harsh outdoor conditions.
When applying a second coat, follow the same steps as the first, but be sure to give the deck enough time to dry between coats. Applying a second coat too soon can cause the stain to streak or not adhere properly. Depending on the stain type and weather conditions, you may need to wait 24-48 hours before adding the second coat.
A second coat, when done correctly, ensures the stain fully penetrates the wood and provides long-lasting protection from UV rays, rain, and general wear and tear. This extra layer can make all the difference in preserving your deck’s appearance and durability.
By following these detailed steps, you can confidently stain your deck, knowing it will not only look beautiful but also stand up to New Zealand’s unique weather conditions for years to come.
Post-Staining Care And Maintenance
Taking proper care of your deck after staining is crucial to ensure it remains in excellent condition for years to come. By following a few simple steps, you can extend the life of your deck stain and keep your outdoor space looking fresh and inviting. Let’s dive into the essential aspects of post-staining care, from drying and curing times to long-term maintenance tips, all tailored for New Zealand’s unique climate.
Drying Time and Curing
Once you’ve finished staining your deck, it’s important to give it adequate time to dry before walking on it. In general, most deck stains require a minimum of 24 to 48 hours to dry to the touch, but this timeframe can vary based on the type of stain used, the amount of direct sunlight, and the humidity in the air. In New Zealand, where weather conditions can be unpredictable, especially in coastal or humid regions, you’ll want to account for potential delays in drying time. For example, areas like Auckland, with higher humidity, may need more time than drier regions like Canterbury.
Curing, on the other hand, refers to the time it takes for the stain to fully set and offer maximum protection. While the deck might be dry enough to walk on after a day or two, the full curing process typically takes between 5 and 7 days. During this period, try to avoid placing heavy furniture or items on the deck to prevent any potential marks or dents. Full curing ensures that the stain has penetrated the wood thoroughly, offering optimal protection from UV rays, moisture, and everyday wear. If you can, aim to stain your deck during a week of mild, dry weather to help expedite the curing process.
Maintaining Your Stained Deck
After your deck has been properly stained and cured, ongoing maintenance is key to preserving its look and functionality. Here are a few tips to keep your deck in top shape:
1. Regular Cleaning: To keep your stained deck looking fresh, it’s important to clean it regularly. Dirt, leaves, and other debris can accumulate on the surface and trap moisture, leading to mildew or mold. Use a soft broom to sweep away loose debris and a gentle deck cleaner with a soft brush to clean the surface. Avoid using a pressure washer, as it can strip away the stain and damage the wood fibers. In New Zealand’s rainy regions, such as the West Coast, you may need to clean your deck more frequently to prevent moisture buildup.
2. Maintenance Schedule: In New Zealand’s diverse climate, your deck will be exposed to various weather conditions, from harsh sun in summer to heavy rains in winter. It’s generally a good idea to apply a fresh coat of stain every 1 to 3 years, depending on your location and the amount of sun and rain your deck receives. Decks in sunnier areas like the Bay of Plenty may require more frequent maintenance to prevent UV damage, while those in more temperate regions may only need to be re-stained every few years.
3. Spot Treatment and Touch-Ups: Between full staining sessions, you can extend the life of your deck by spot-treating areas that show signs of wear. This includes high-traffic areas like steps or entryways, which might fade more quickly. Simply clean the area, lightly sand if needed, and apply a small amount of stain to blend with the rest of the deck. Touch-ups help maintain the overall appearance and protection of your deck without the need for a full re-staining job.
By following these simple maintenance steps, you can ensure that your deck remains a beautiful and durable feature of your outdoor space for many years, even in the face of New Zealand’s ever-changing weather. Regular cleaning, timely re-staining, and a little care will help your deck stay protected, saving you time and effort in the long run.

Common Deck Staining Mistakes To Avoid
When staining a deck, especially in New Zealand’s climate, getting the best results means paying attention to some common mistakes that can easily undermine your hard work. By understanding and avoiding these errors, you’ll ensure a more professional and long-lasting finish on your deck.
Skipping Prep Work
One of the most significant mistakes people make when staining their deck is skipping essential prep work. Preparing the deck surface is crucial for achieving an even, smooth stain application. Many homeowners, eager to see quick results, jump straight into applying the stain without cleaning or sanding the wood properly. However, failing to clean the deck means that dirt, mildew, or old residue from previous stains will remain trapped under the new stain, leading to uneven coverage or poor adhesion.
Deck cleaning involves using a good-quality deck cleaner and a scrub brush to remove any dirt, algae, or surface buildup. In some cases, pressure washing can also help, but be sure not to damage the wood with too much pressure. Sanding may be necessary, particularly if the wood has rough patches or splinters, or if there’s an old stain that hasn’t worn off entirely. Sanding smooths out the surface, opening up the wood grain so it can absorb the stain evenly. Neglecting this step often results in blotchy or peeling stains, which means you’ll have to redo the job much sooner than anticipated.
Applying Stain in Direct Sunlight
New Zealand’s intense UV rays present a unique challenge when staining a deck. Applying stain in direct sunlight is a common mistake that can have a big impact on the final outcome. Sunlight causes the stain to dry too quickly, which doesn’t allow the wood enough time to absorb the stain properly. This leads to uneven patches and lap marks that can ruin the deck’s appearance. Quick drying also prevents the stain from penetrating deeply into the wood, reducing its protective effectiveness.
To avoid this, plan to stain your deck early in the morning or late in the afternoon, when the sun is less intense. Alternatively, choose a cloudy day or work in shaded areas to allow for slower, even drying. Always check the weather forecast and try to schedule your deck staining project when conditions are optimal, avoiding direct sunlight and heavy winds that could blow debris onto the wet stain.
Over-Application of Stain
It’s easy to think that more stain will lead to better protection, but over-applying stain can actually have the opposite effect. Deck wood is only able to absorb a certain amount of stain; anything beyond that will sit on the surface, resulting in a sticky, tacky finish. This excess stain can cause blotches, create shiny spots where the stain hasn’t fully absorbed, and may lead to peeling and cracking over time as the excess stain doesn’t bond with the wood properly.
To prevent over-application, always follow the manufacturer’s instructions regarding how many coats are needed. In most cases, one or two thin coats are sufficient for proper coverage and protection. After applying the first coat, allow it to dry fully before deciding if a second coat is necessary. It’s important to remember that stain works by soaking into the wood, so when it starts pooling or leaving shiny patches, it’s a sign you’ve applied too much. Wipe off any excess stain after about 15-20 minutes to ensure a smooth, even finish that will dry properly and protect your deck for years to come.
By avoiding these common mistakes, you’ll be setting yourself up for a successful deck staining project that not only enhances the beauty of your deck but also ensures long-lasting protection against New Zealand’s ever-changing weather conditions.

FAQs: About How To Stain A Deck NZ
How often should I stain my deck in New Zealand?
In New Zealand’s climate, it’s generally recommended to stain your deck every 1-3 years, depending on weather exposure and the quality of the stain used. Coastal areas or regions with harsh sun may require more frequent staining to protect the wood from UV damage.
What is the best time of year to stain a deck in NZ?
The best time to stain a deck in New Zealand is during the spring or autumn months when the weather is milder, with lower humidity and consistent dry conditions. Avoid staining during rainy seasons or extremely hot summer days, as this can affect the stain’s ability to dry properly.
Can I stain a deck over old stain?
Yes, you can stain over old stain if it’s still in good condition. However, it’s important to clean the deck thoroughly first and lightly sand any rough areas to ensure the new stain adheres properly. If the old stain is peeling or faded, it’s best to strip it before applying a new coat.
Should I use an oil-based or water-based stain?
Both oil-based and water-based stains have advantages, but oil-based stains are generally better for NZ’s harsh UV exposure as they penetrate deeper into the wood, offering better protection. Water-based stains dry faster and are easier to clean up but may not last as long in high-sun areas.
How long should I wait after cleaning the deck before staining it?
After cleaning your deck, allow at least 24-48 hours for the deck to dry completely before applying the stain. This ensures that the wood is dry enough to absorb the stain properly. In humid or coastal regions, you may need to wait longer.
Do I need to sand the deck before staining?
Sanding is not always necessary but is recommended if your deck has rough spots, splinters, or an old, peeling stain. Sanding helps create a smooth surface that absorbs the stain evenly. If your deck is in good condition, a thorough cleaning may be enough.
What is the difference between transparent, semi-transparent, and solid stains?
Transparent stains provide minimal color but highlight the natural wood grain. Semi-transparent stains add a bit more color while still showing some grain. Solid stains offer the most coverage and color, hiding most of the wood grain but providing the most protection against UV rays and weather.
How long does it take for the deck stain to dry?
Deck stain usually takes 24-48 hours to dry to the touch, but full curing can take up to 72 hours, depending on weather conditions. It’s best to avoid walking on the deck during this time to ensure an even finish. Humid or wet conditions can prolong drying times.
Can I stain my deck if it’s damp?
No, staining a damp deck will prevent the stain from adhering properly and can result in uneven color or peeling. Always ensure the deck is completely dry before starting the staining process. If it has rained recently, wait several days for the wood to dry out.
How can I maintain my deck after staining?
To keep your stained deck looking fresh, clean it regularly with a deck cleaner and a soft brush. Avoid using harsh chemicals or pressure washing, as these can strip the stain. Reapply a maintenance coat of stain every 1-2 years, or as needed, depending on how much exposure your deck gets to sun and rain.
Conclusion
In conclusion, staining your deck in New Zealand is a crucial step in maintaining both its appearance and durability, especially given the country’s diverse and often harsh climate. By taking the time to properly clean, prepare, and apply the stain, you’re not only enhancing the aesthetic appeal of your outdoor space but also protecting the wood from damage caused by UV rays, moisture, and temperature fluctuations. It’s important to plan the project carefully, choosing the right stain and weather conditions to ensure the best results. A well-maintained deck adds value to your home and provides a beautiful, functional space for you and your family to enjoy for years to come. If you have any questions about the process or would like to share your own deck staining experience, feel free to leave a comment below—we’d love to hear from you!
About the Author:
Mike Veail is a recognized digital marketing expert with over 6 years of experience in helping tradespeople and small businesses thrive online. A former quantity surveyor, Mike combines deep industry knowledge with hands-on expertise in SEO and Google Ads. His marketing strategies are tailored to the specific needs of the trades sector, helping businesses increase visibility and generate more leads through proven, ethical methods.
Mike has successfully partnered with numerous companies, establishing a track record of delivering measurable results. His work has been featured across various platforms that showcase his expertise in lead generation and online marketing for the trades sector.
Learn more about Mike's experience and services at https://theleadguy.online or follow him on social media: